🖐🏻 免责声明
本教程仅供学习交流使用,严禁用于商业用途和非法用途,否则由此产生的一切后果均与作者无关,请各读者自觉遵守相关法律法规。
# 1.安装虚拟环境并激活
虚拟环境参考->我的另外一篇文章:Python的虚拟环境使用教程
virtualenv venv(venv为环境名,按自己需求取名即可)- 激活虚拟环境
source venv/bin/activate(这是mac的方式)
# 2.虚拟环境下安装scrapy
pip install Scrapy
# 3.创建爬虫项目
scrapy startproject testproject
# 4.创建爬虫类
- scrapy genspider testpachong "https://gg.agency/webmaster/home"
- testpachong:爬虫名
- "https://gg.agency/webmaster/home" 爬虫地址
- 默认空白爬虫代码
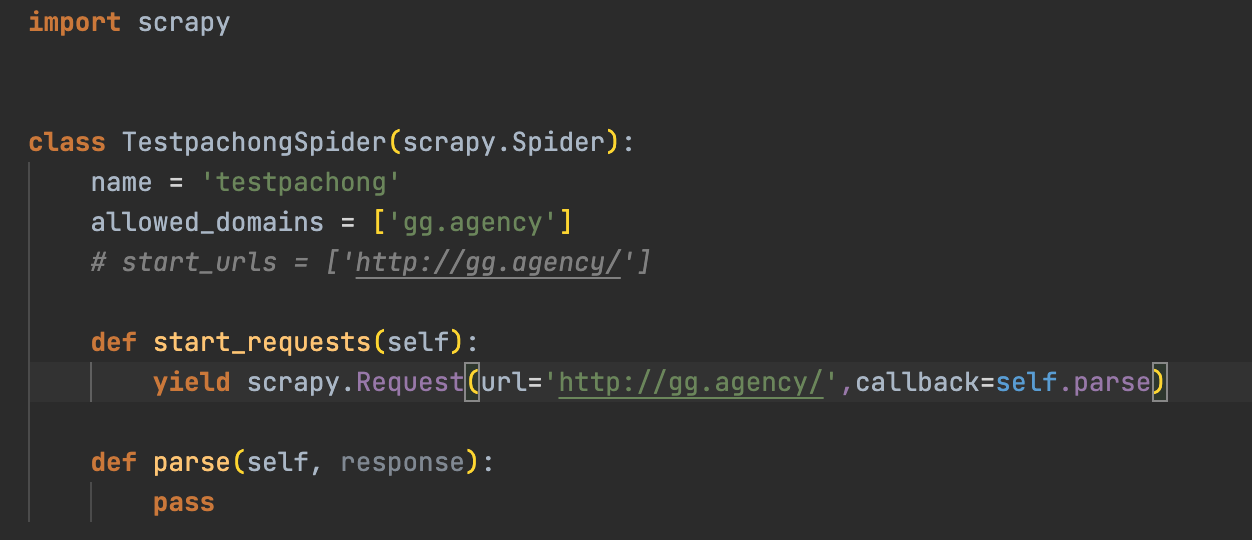
- 注释掉start_urls,自己实现start_requests方法
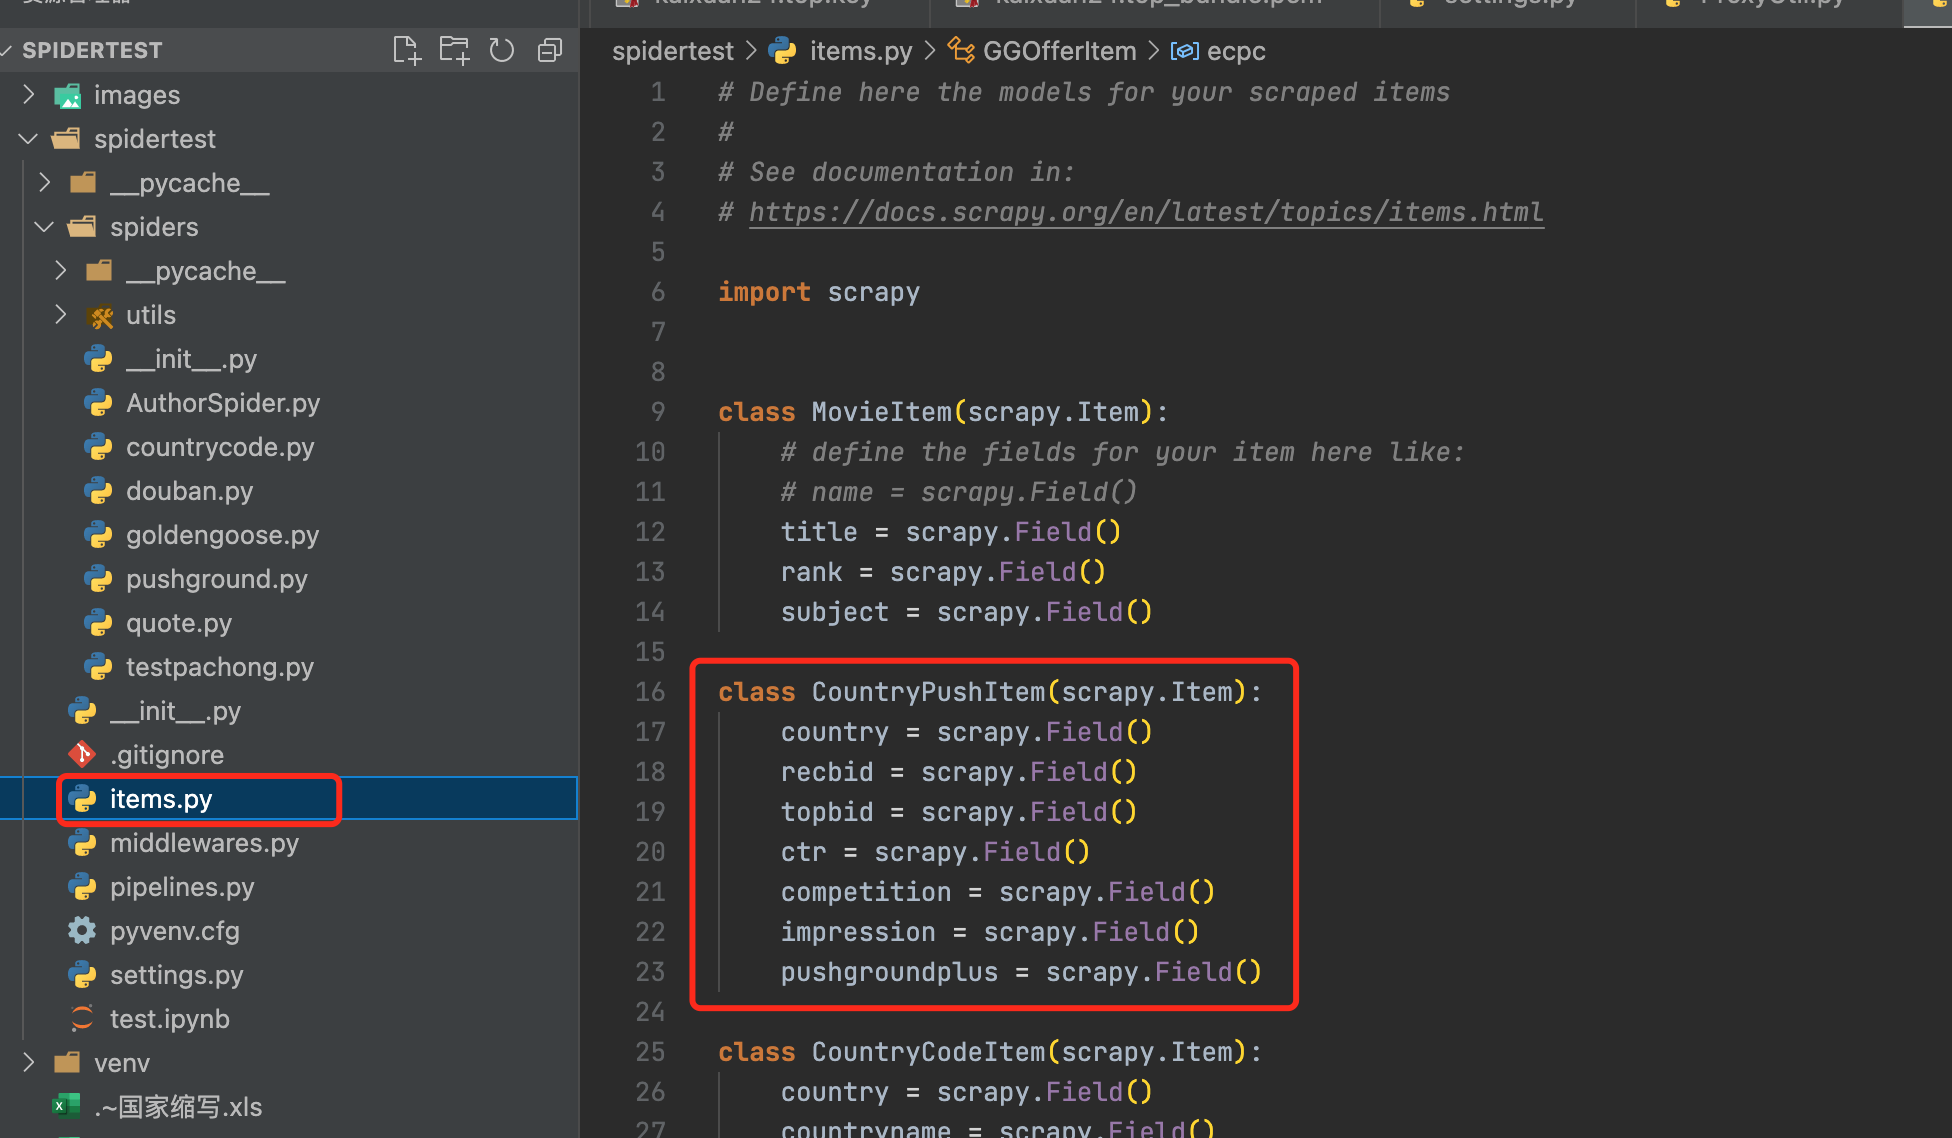
# 5.定义item
定义item
引用items
from spidertest.items import GGOfferItem传递item,在
def parse方法中yield item
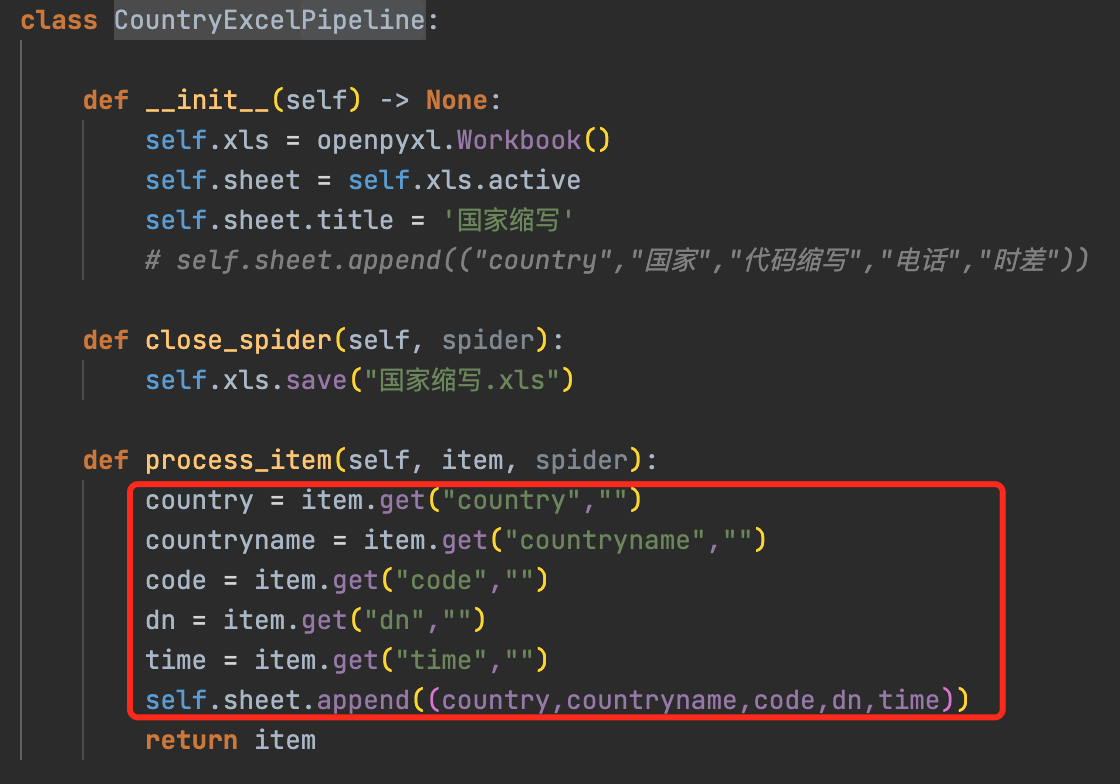
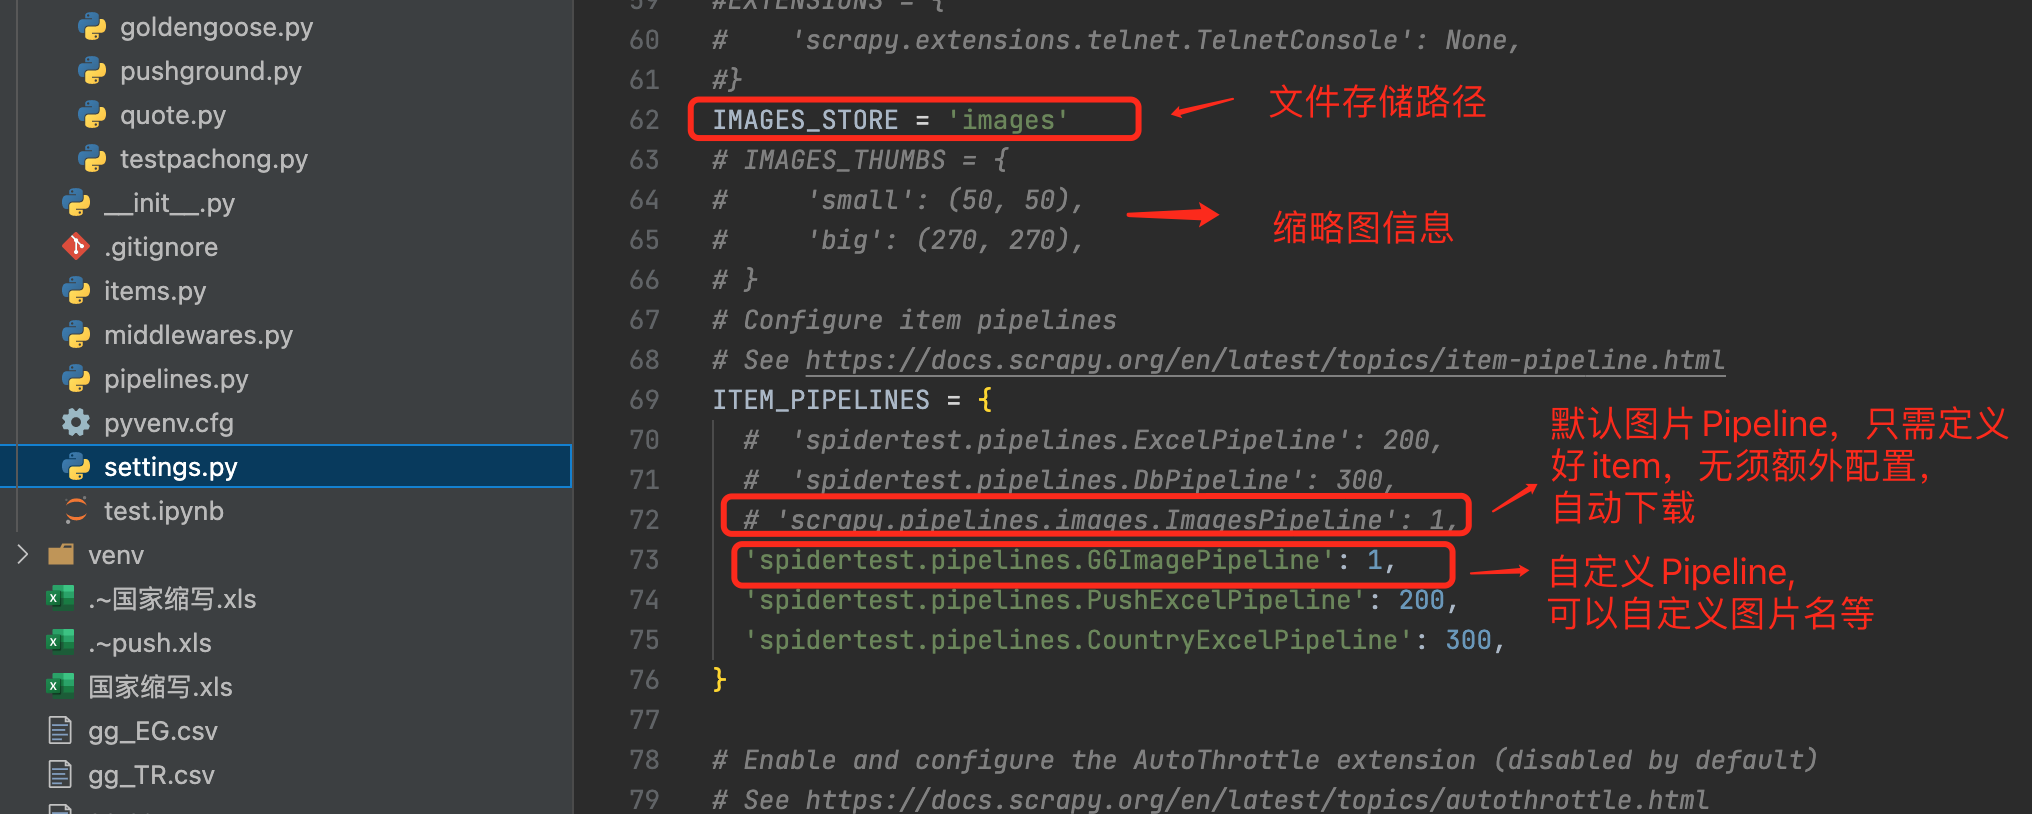
# 6.定义Pipeline并在setting.py中打开配置
Pipeline作用:可以对爬取的item进行处理,比如插入数据库或excel等
自定义Pipeline
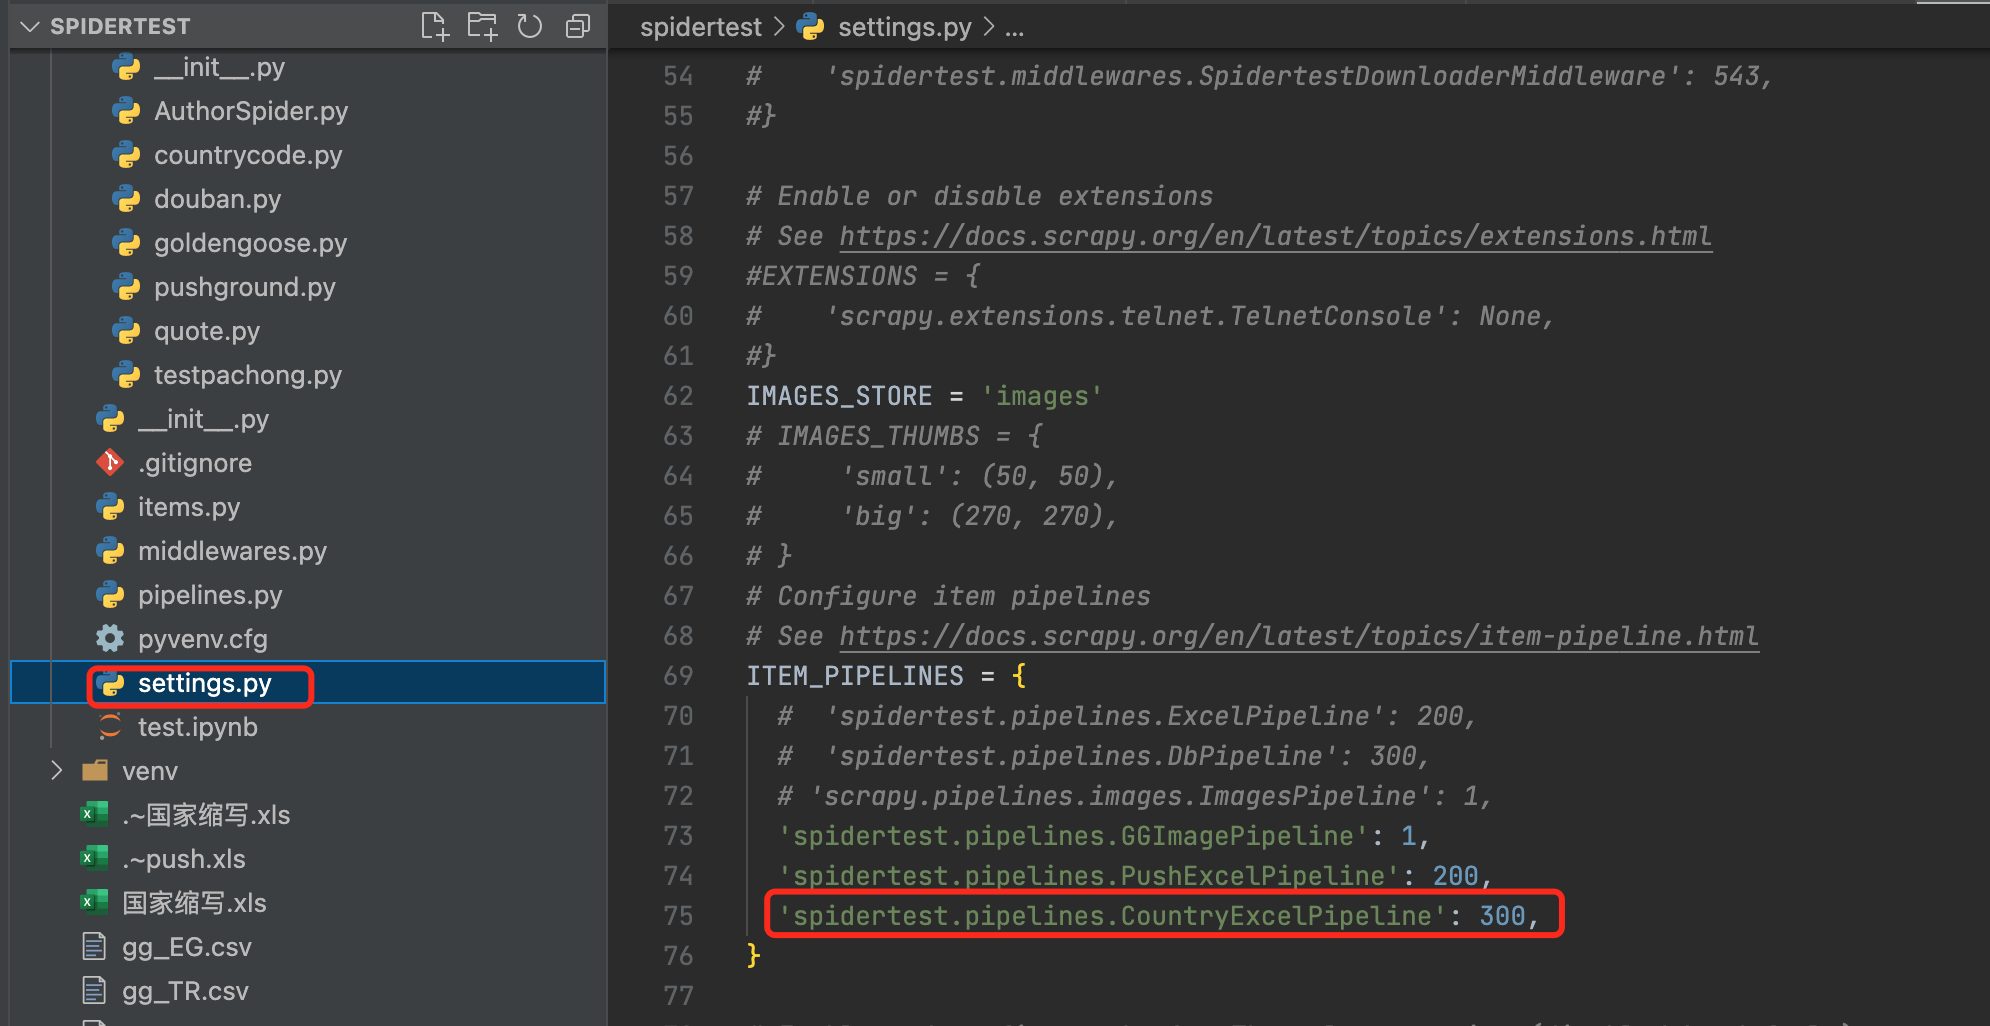
打开配置(setting.py)
# 7.运行爬虫
scrapy crawl testproject
testproject为项目名
# 8.常用技巧
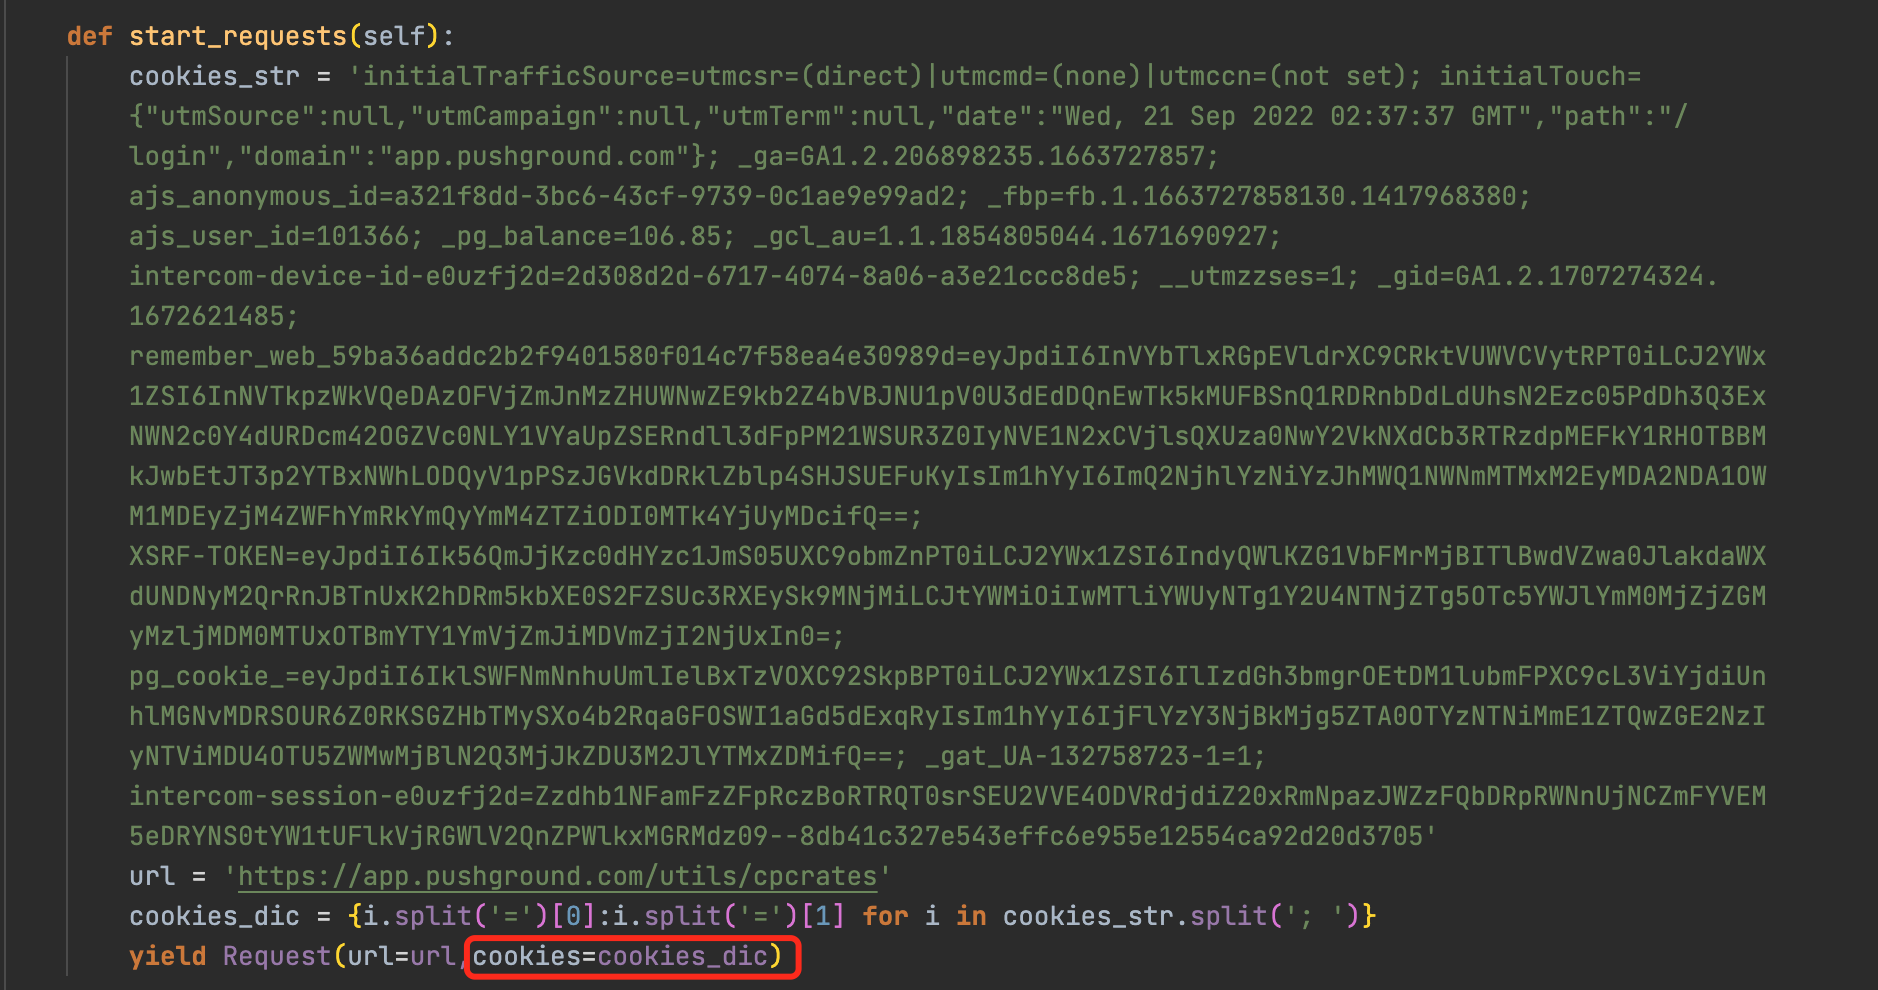
附带cookie
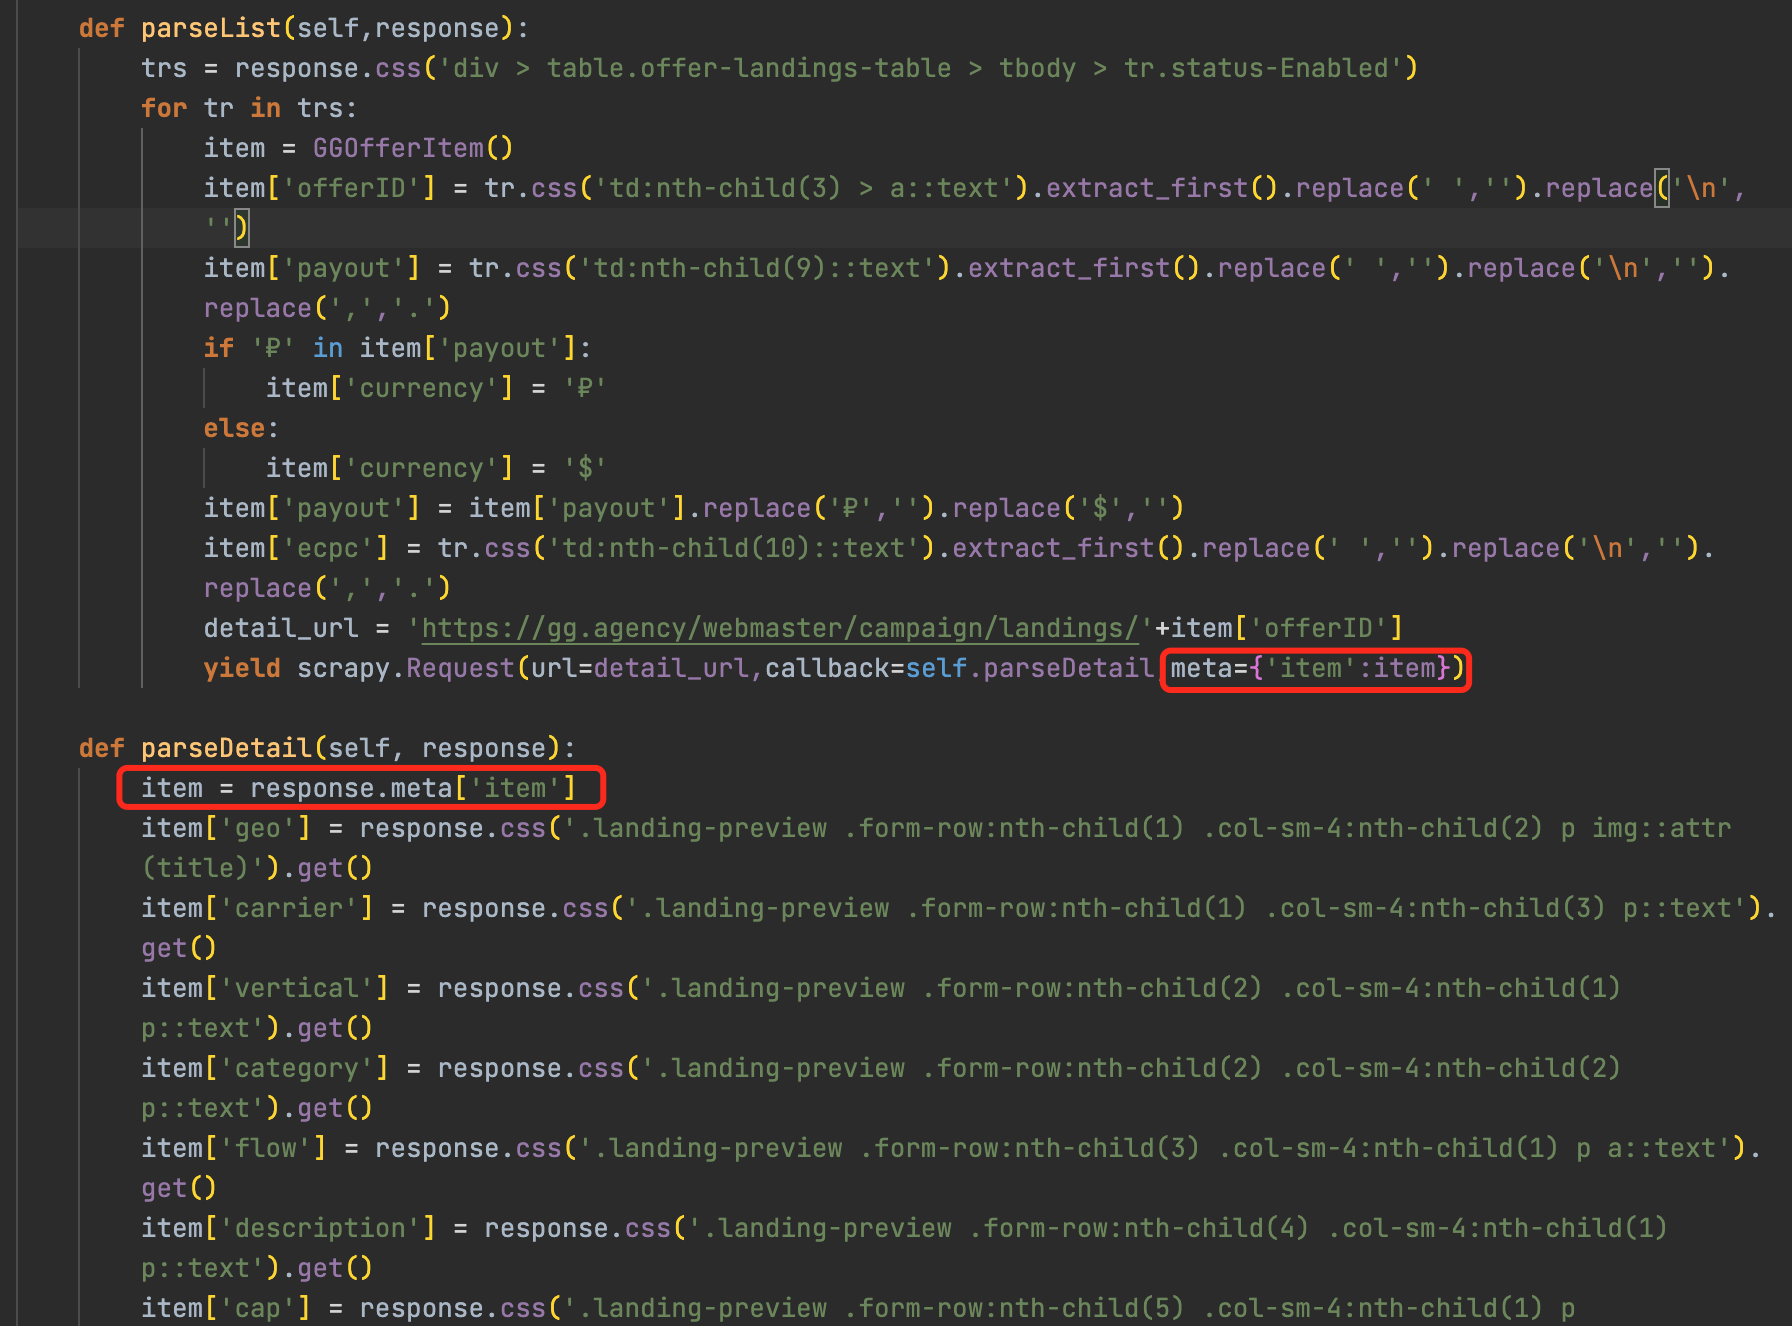
详情页传递item
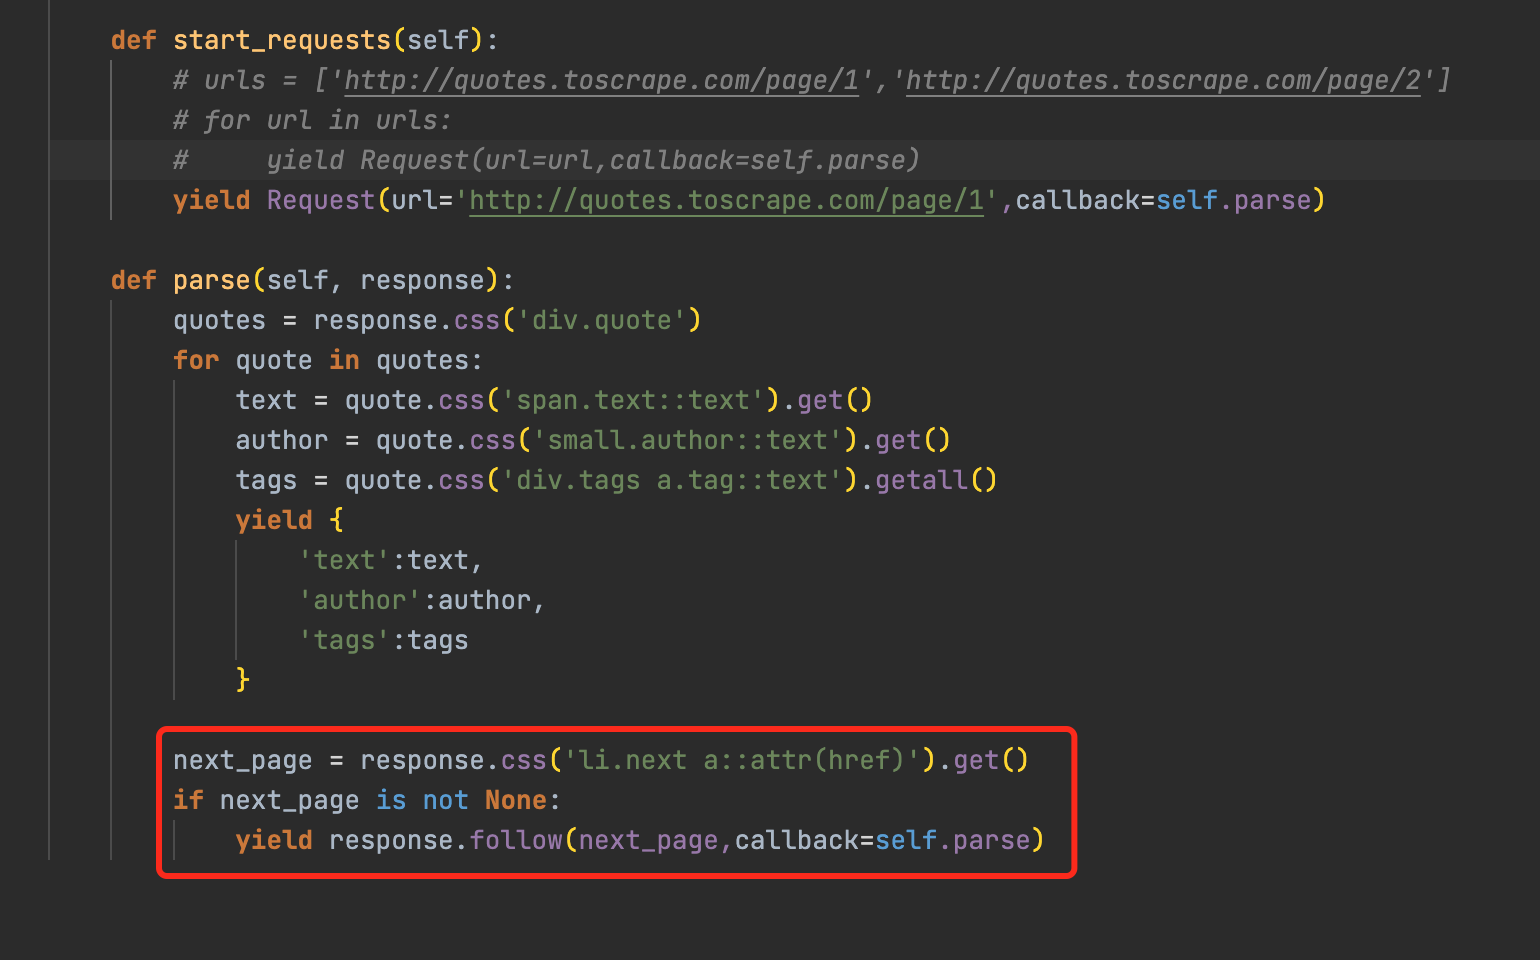
分页
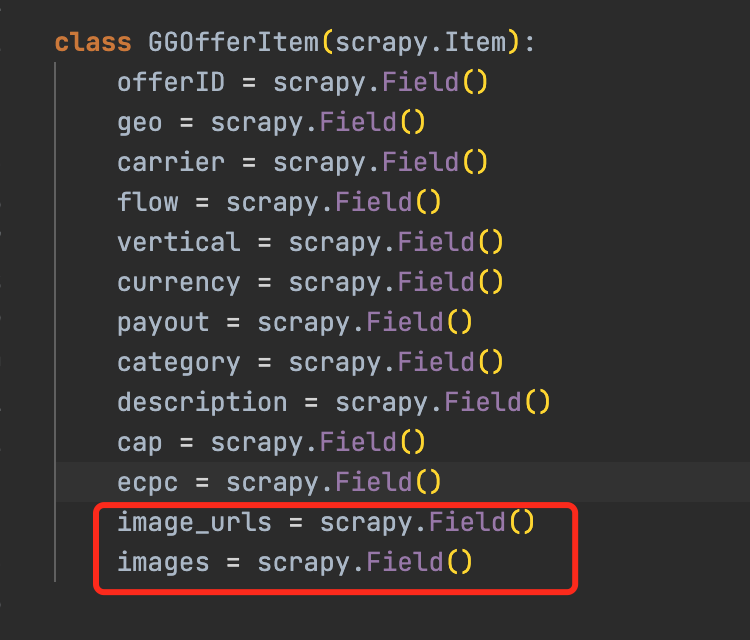
图片下载
- ImagesPipeline requires installing Pillow 4.0.0 or later
- pip install Pillow
- 定义item->image_urls和image
- 自定义Pipeline继承自imagePipeline
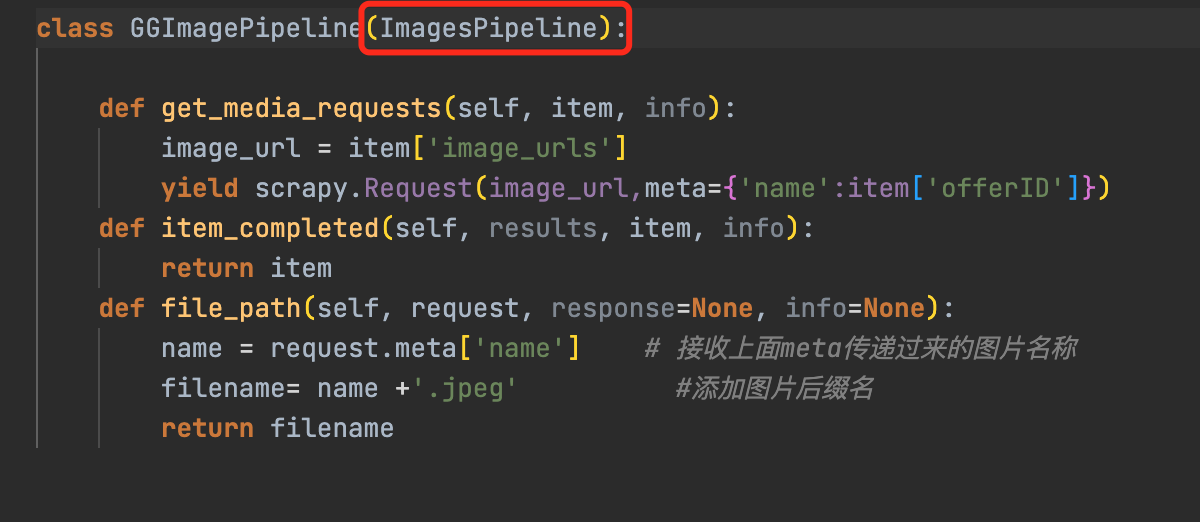
- 打开imagePipeline配置
- ImagesPipeline requires installing Pillow 4.0.0 or later
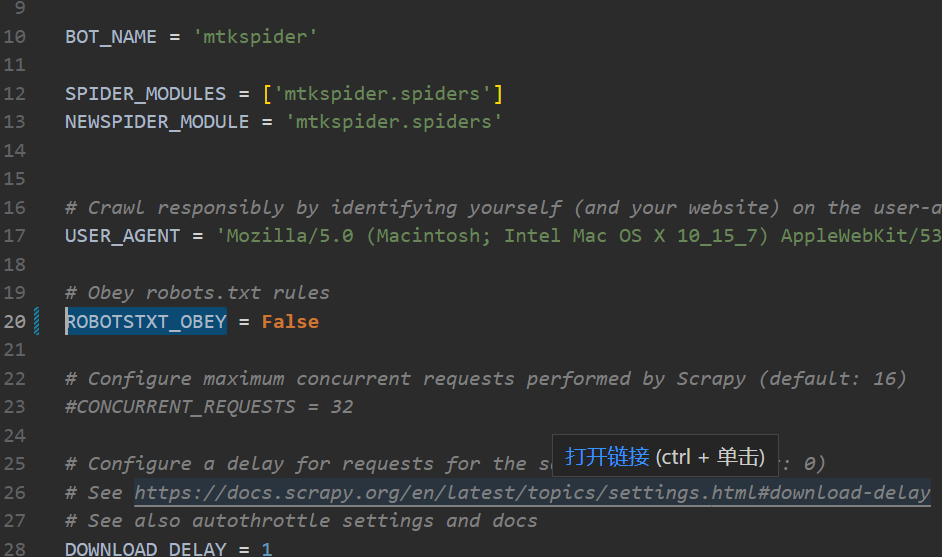
不遵守robot.txt
传url数组
yield from response.follow_all(anchors, callback=self.parse)
断点续爬
scrapy crawl companyurl -s JOBDIR=job_info/001- ctrl-c暂停
- 再次输入相同命令恢复爬虫
# 9.更多设置关注官网 (opens new window)
比如延迟爬虫啊,中间件的使用啊,随机useragent,代理啊等